
Guide
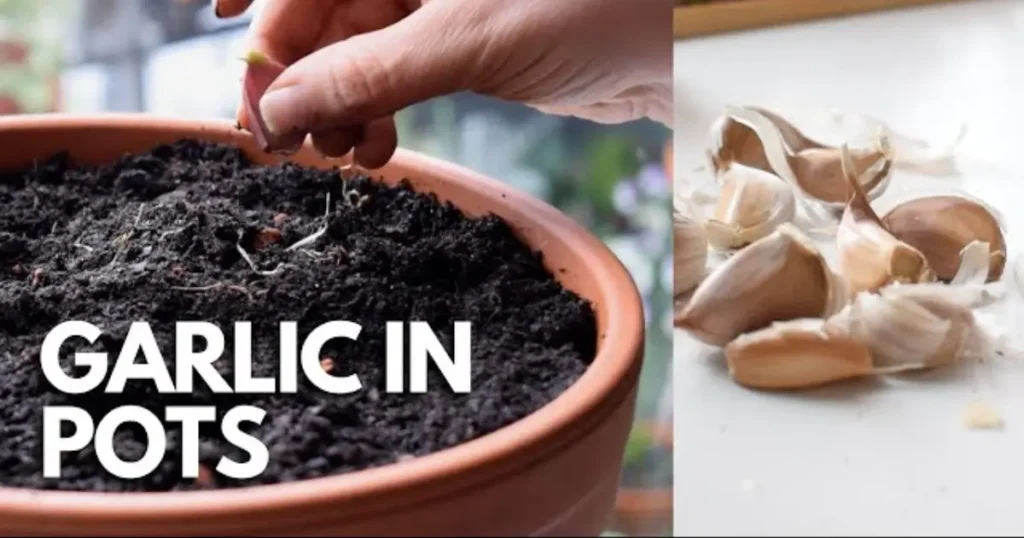
How to Grow Garlic in Pots: Fresh Flavor for Every Space
Nov
Have you ever pulled a clove of garlic from your kitchen drawer, only to find it sprouting tiny green shoots? That’s garlic’s way of telling you it’s ready to grow. And the best part? You don’t need a backyard to make it happen.
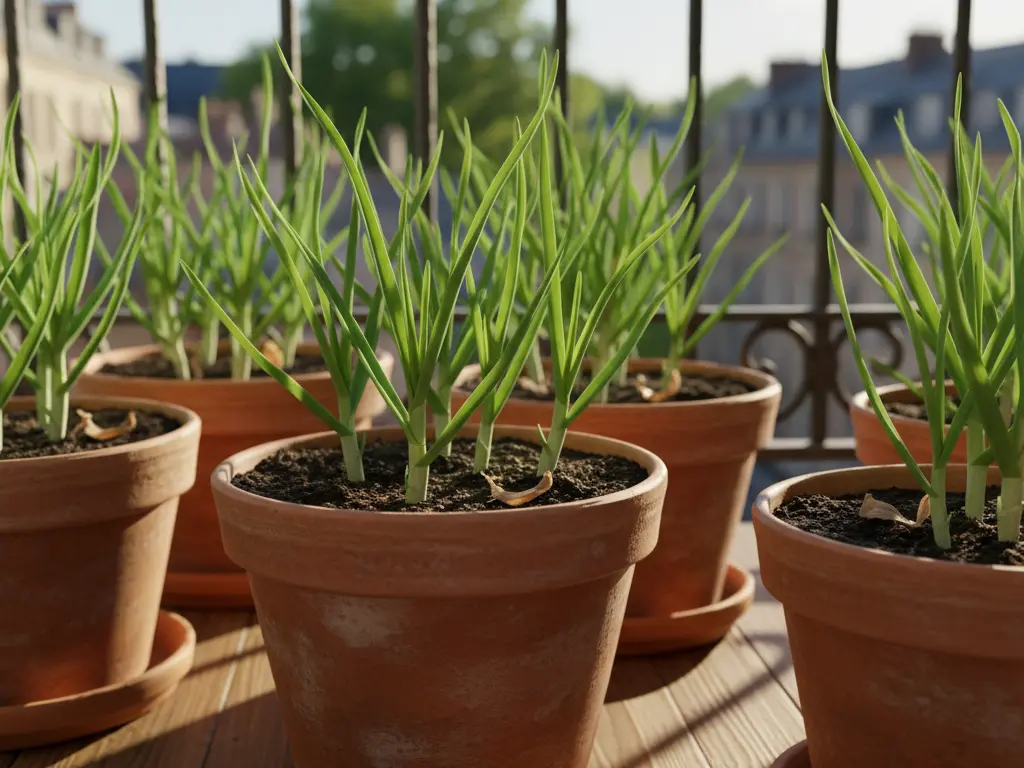
Growing garlic in pots is a wonderful way to enjoy fresh, homegrown flavor even if you only have a balcony, patio, or sunny window. Container gardening keeps things tidy, manageable, and perfectly suited for small spaces. It’s also an easy entry point for beginners who want to grow their own food without needing a full garden plot.
Once you plant garlic, it quietly does its thing – no fuss, no drama. A little sunlight, steady moisture, and a dash of patience are all it needs. Let’s walk through everything you need to know to grow garlic in pots from start to finish.
Why Grow Garlic in Pots?
There are plenty of reasons gardeners fall in love with growing garlic in containers.
- Space efficiency. You can grow garlic anywhere there’s sunlight, balcony railings, decks, window boxes, or even repurposed tubs.
- Pest and disease control. Planting in pots helps avoid soil-borne diseases like white rot and keeps pesky pests at bay.
- Perfect for small gardens. Containers make it easy to rotate your crops or move your plants around to catch the best light.
- Convenience and flavor. There’s nothing like pulling a head of garlic that you grew yourself. It’s fresher, stronger, and more aromatic than anything from the store.
- Low-maintenance. Garlic is a “set it and forget it” type of plant. Once you’ve planted it, it practically takes care of itself for months.
Garlic’s Growth Cycle
Garlic is a patient plant. It spends most of its time quietly developing underground.
If you plant in autumn, your cloves will establish roots before winter and then go dormant. As the weather warms in spring, they’ll burst back to life and start forming bulbs. This method usually gives you the biggest harvests.
If you plant in spring, your garlic will still grow just fine, though the bulbs may be slightly smaller.
In cold regions, the plant may lose its top growth during winter, but don’t worry – it’s simply resting. Keep the soil lightly moist, and new shoots will reappear once temperatures rise.
Step 1: Choosing the Right Garlic Variety
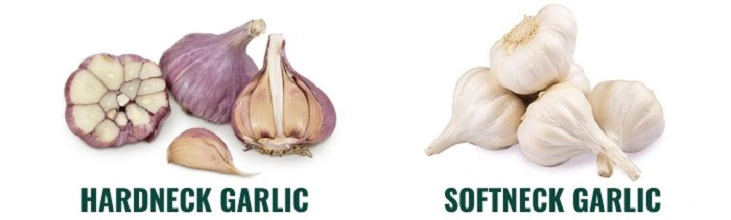
Garlic comes in two main types: softneck and hardneck. Each has its own strengths, and your climate will help decide which is best.
-
Softneck Garlic: This is the type most often found in grocery stores. It’s great for warm climates, produces more cloves per bulb, and stores exceptionally well. Varieties like Silverskin and Artichoke are reliable choices.
-
Hardneck Garlic: Best for cooler regions. It produces fewer, larger cloves and grows a flowering stalk called a scape, which you can harvest and cook with. Try varieties like Rocambole, Porcelain, or Purple Stripe.
If your winters are mild, go with softneck. If you experience a cold winter, hardneck is the better fit. Either way, you’ll end up with delicious, aromatic bulbs that add depth to every dish you cook.
>>>Read more: 5 Popular Garlic Varieties to Grow This Fall (Easy Guide for Home Gardeners)
Step 2: Picking the Perfect Container
Garlic doesn’t have large roots, but it appreciates space to spread out and breathe. Choose a pot that’s at least 12 inches deep and 12 to 16 inches wide.
Material matters too.
-
Terracotta and clay pots breathe well but dry out quickly, which means you’ll need to water a bit more often.
-
Plastic or resin pots retain moisture longer and are lightweight, making them easy to move.
Most importantly, make sure the pot has drainage holes. Garlic hates standing water—its roots will rot quickly if the soil stays soggy.
Step 3: Creating the Ideal Potting Mix
Garlic thrives in loose, well-draining soil that’s rich in organic matter. A light, airy texture helps bulbs develop evenly and prevents rot.
Here’s a simple mix that works beautifully:
-
2 parts high-quality potting soil
-
1 part compost or aged manure
-
1 part perlite or coarse sand
Mix thoroughly before filling your container about two-thirds full. Avoid using heavy garden soil, it’s too dense and can smother roots.
If you’d like to take it a step further, sprinkle a handful of bone meal or slow-release organic fertilizer into the mix before planting. Garlic loves a nutrient boost early on.
Step 4: Planting Garlic Cloves

This is the part every gardener enjoys, the actual planting!
-
Separate your garlic bulb into individual cloves. Don’t peel them; keep the papery skin intact.
-
Pick the biggest, healthiest cloves. These will produce the strongest bulbs later.
-
Plant each clove with the pointed end facing up and the flat root end facing down.
-
Space them about 4 inches apart and bury each clove roughly 2 inches deep.
-
Gently pat down the soil, then water well so it settles around the cloves.
And that’s it. You’ve officially started your own garlic crop.
Step 5: Finding the Best Spot for Sunlight

Garlic absolutely loves the sun. The more light it gets, the better it grows.
Place your pots where they’ll receive at least 6 to 8 hours of full sun each day. If you’re growing indoors, choose a bright south-facing window or use a small grow light to supplement.
If you notice your plants growing tall and pale, it’s a sign they need more light. Rotate the pot occasionally to ensure even growth on all sides.
Step 6: Watering Wisely
Garlic enjoys steady moisture but does not like sitting in soggy soil.
A simple rule of thumb: water when the top inch of soil feels dry to the touch.
-
In cooler months, you might only water once a week.
-
During hot, dry periods, check your pot daily.
Always water deeply so the moisture reaches the developing roots, but let the excess drain away freely. Garlic roots need oxygen as much as they need water.
As harvest time nears and the leaves begin to yellow, reduce watering. This helps bulbs mature and prevents splitting.
Step 7: Feeding for Strong Growth
Garlic doesn’t require much feeding, but giving it the right nutrients at the right time can make a big difference.
-
Use a balanced liquid fertilizer (10-10-10) every four weeks during the active growing season.
-
Stop fertilizing once bulbs begin to form in late spring or early summer.
-
For an organic approach, compost tea or fish emulsion works wonders.
Remember, over-fertilizing, especially with nitrogen, can encourage lush green leaves but smaller bulbs.
Step 8: Managing Pests and Diseases
Garlic is naturally pest-resistant—one reason gardeners love it—but it’s still wise to stay alert.
Common issues:
-
Aphids: Occasionally cluster on young shoots. Wipe them off or spray with neem oil.
-
White rot: A soil fungus that thrives in wet conditions. Avoid by using fresh, sterile potting mix.
-
Root rot: Usually a sign of overwatering. Always ensure proper drainage.
Healthy, well-spaced plants in full sun rarely experience problems. Think of garlic as a quiet, reliable companion in your garden—it doesn’t cause much trouble.
Step 9: Harvesting and Storing Garlic
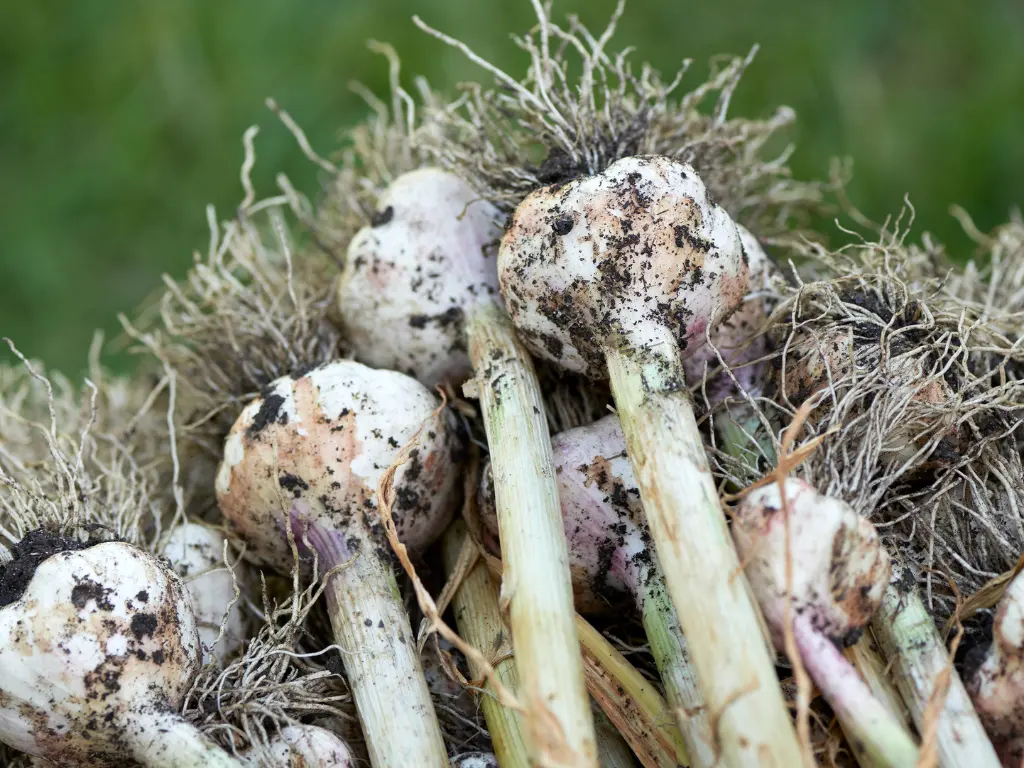
After several months of steady growth, your patience pays off.
When to harvest:
-
Most garlic is ready about 8 to 9 months after planting.
-
Watch for the lower leaves to start yellowing and drying—this signals the bulbs are mature.
How to harvest:
-
Loosen the soil gently with your hands or a small trowel.
-
Pull each bulb up by the base, not the leaves.
-
Brush off the dirt but don’t wash them yet.
Lay the bulbs in a dry, airy spot away from direct sunlight to cure for two to three weeks. Once the skins feel papery, trim the roots and tops.
Store in a cool, dry, well-ventilated place. Properly cured garlic can last for several months, retaining both flavor and texture.
Bonus Tips for Cold Climates
If you live where winters are harsh, a few simple tricks can protect your potted garlic.
-
Move pots close to a wall or sheltered corner to block cold winds.
-
Add a thick layer of mulch, straw, or shredded leaves to insulate the soil.
-
In extremely cold regions, bring pots into an unheated garage or shed until spring.
Garlic is tougher than it looks. Even after a frosty season, it bounces back with new growth when warmer days return.
Frequently Asked Questions (FAQs)
Can I plant store-bought garlic?
You can, as long as it’s organic and hasn’t been treated with chemicals that prevent sprouting. Grocery store garlic sometimes struggles to grow, so for the best results, buy seed garlic from a nursery or online supplier.
How long does it take to grow garlic?
Usually around eight to nine months. Plant in fall, and you’ll harvest by mid to late summer the following year.
Can I grow garlic indoors all year?
Yes! For full bulbs, it’s tricky without enough light, but you can easily grow garlic greens. Plant a few cloves in a shallow container and snip the shoots as they grow for a milder, onion-like flavor.
Why are my bulbs small?
Small bulbs usually mean insufficient sunlight, crowded planting, or too much nitrogen fertilizer. Make sure your plants get plenty of sun and room to grow.
Final Thoughts
Growing garlic in pots is one of the simplest, most satisfying projects a gardener can try. It doesn’t require much space, it adds beauty and fragrance to your patio or balcony, and the reward—fresh, homegrown garlic—is truly unbeatable.
Once you’ve experienced the joy of harvesting your own bulbs, you’ll never look at store-bought garlic the same way again.
So, grab a pot, choose a few healthy cloves, and start your garlic-growing adventure today. With a bit of sunlight, patience, and care, you’ll soon be cooking with your very own harvest—straight from your container garden to your kitchen.
Happy growing, and even happier eating.
You may like: